Good morning everybody. I initially planned to upload pictures with this tutorial (and maybe I will) but for now I can't so i'll try to make the steps as clear as possible.
So you clearly have an A+ (not on your report card though) and first order of business (after preening of course) would be to root it. well here is how:
Rooting
1. Download the root eroot v1.3 (you should be able to find the link on nairaland. Too lazy to look) and pda.net (same as eroot). An alternative is to download my own root package here:
Here
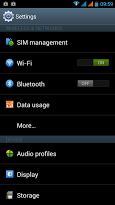
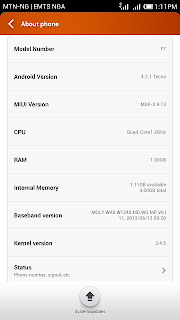
2. Install Pda.net and den open eroot. (this happens on a computer not your phone) Now on your phone you will have to navigate to Settings/About phone and click on build number at least 8 times. it should tell you something about now being a developer (as if it was that easy). go back one step and you should be back in settings. just above about phone you should find a new item called Developer options (a bit of warning here, dont mess with this area if you dont know what you are doing. part of being a developer is the ability to help your device "develop" problems)
3. just this once, click on developer options and at the top, switch it on and den scroll down and tick the usb debugging option. now go back to your homescreen and plug your device to your laptop. You will need to connected as USB storage or media device for the system to recognize your device. Eroot should display the name of your phone if done correctly.
4. Click the big green button and that usually should do the rooting. if successful you should have a new menu item named "superuser". if so then your are rooted. congratulations.
5. if alternatively you downloaded my root kit then open the folder, plug your phone after doing steps 2 and 3 (minus the eroot. the pda.net is still important). click the run batch file. (usually the first one) and follow the on screen instructions). once done your phone would restart and you would be rooted. congrats once again.
Clockwork Recovery
It is imperative to note that while cwm isnt a must, if you ever plan to root your phone and enjoy its benefits then you must accept the fact that something might go wrong along the way. with that in mind i usually recommend this step immediately after rooting. if you wont flash cwm, then i will advice against rooting also (there is the door, thanks for stopping by).
1. Download "mobileuncle tools" from
here (you must be rooted for this app to work). (for some reason the one some people download causes errors so please use this one)
2. once it is installed, download the cwm from
here (On some browsers the file recovery.img comes in another name with a .bin extension. Use your file manager to change it to .img before flashing
3. now put the image inside your memory card directly (not in a folder) and open the mobileuncle tools and choose the Recovery Update option. It would be the first one you see on the list.
4. select it and say yes to all it asks..(it wont take advantage of you, I promise).
5. It should reboot into recovery. which is a dark screen with blue text. (in the future, use the power button + volume up button to enter recovery mode)
Now lets back up your phone.
1. you will need at least 2GB free to back up as well as at least 50% bat3. Use the volume buttons to scroll up and down and the power button to make selections.
2. once you are in recovery mode, scroll down to backup and restore and select it. next choose the backup option which is usually the first option. Sit back and relax cuz it takes a while. Once that is done, scroll down to go back and den select the reboot phone option to turn your phone back on
So now we have rooted and backed up our phone. We can even flash superman.
Unbricking
Go
Here to unbrick
Lets skip to the coolest part.
Custom Roms
1.
Thunderous Nightmare
Introducing the Thunderous Nightmare rom for A+
The First Android 4.2.2 Custom Rom for Tecno A+ (Stable ROM)
Melting Rocks by Muntazir Abbas; (A tribute to someone)
Ported by Seun Payne
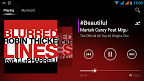
BLOW TO UNLOCK+WALKMAN+TOUCHWHIZ+S4 MEDIA+BUMP+S-VOICE
Features:-
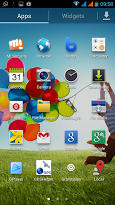
--> S4 TouchWiz Launcher
--> S4 Task Manager
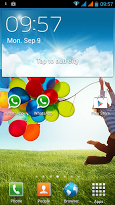
--> Samsung S4 Wallpapers
--> Samsung S4 Music
--> Samsung S4 Widgets
--> S4 AccuWeather
--> Samsung S4 Sounds
--> S4 UI Sounds
--> S4 Notifications
--> S4 Alarms
--> Samsung Bootanimation
--> Samsung Boot Logo
--> Samsung Fonts
--> Samsung Dailer
--> Samsung Framework
--> Samsung Settings
--> Wireless Display
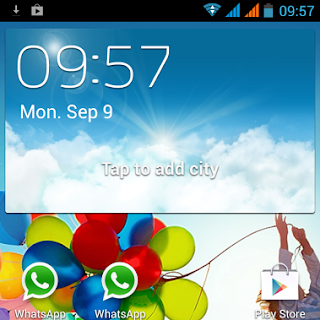
--> New LockScreen (blow to unlock)
--> New Gesture supported Keyboard
--> New Sound Recorder
--> Ext4 Tweaks
--> Maxed out speed & Performance
--> Disabled most logging activities
--> Battery calibrated automatically
--> VM heap tweaks
--> Extended Reboot Commands
--> Fully Deodexed
--> Removed Micromax Registration
--> Full CPU & GPU Utilization
--> Build.prop Tweaks
--> Faster and Smoother
--> Faster Streaming
--> Internet Tweaks
--> Network Tweaks
--> Proximity Tweaks
--> Battery Tweaks
--> Samsung S-Voice
--> Bump feature (sharing)
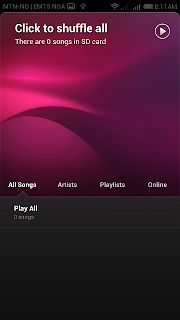
--> Walkman
--> GPS fixed
Xposed Framework
--> XTheme Engine
--> Xposed Tweakbox
--> Xposed TabletUi
--> Xposed Clock
--> Xposed Delivery Notify Toast
--> Xposed Additions
--> Xposed Icon Themer
--> Xposed Smiley Replacer
--> Xposed CRT Animation
NO need to DOWNLOAD any other app for downloading videos from YOUTUBE "Click on OGyoutube"
it will show download option for videos {Same GUI as YOUTUBE}
How To Flash :
You Can Take CMW Backup to Revert back to your old system (Just in case)
Please Note that the first boot may take upto 10 minutes.
1) Download Melting Rocks.zip File
2) Put into External/Internal SD Card
3) Go to CMW Recovery
4) Wipe Data
5) Wipe Cache
6) Wipe System
7) Wipe Dalvik Cache
cool Select Install From SD (Internal or External)
9) Select Melting Rocks.zip and Select YES
10) In CWM select OK to flash
11) Reboot Your System
12) Enjoy
Download
Here
Note: I Will Not Be Responsible For Any Brick or Any Problem.....So Flash At Your Own Risk.
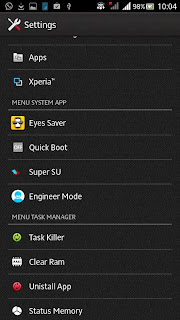
Please Do not Update M! Unlock and even if you do and it's not working then please go to:
Settings>>>Apps>>>All>>>M! Unlock>>>Uninstall Updates.
 BUGS
BUGS
1. Throw function in walkman app force closes
2. ...
2.
UI of LIFE (MIUI v5)
Read all about the rom
here
Download this CWM image. :
Download Only this one will work. Flash with Mobile Uncle (how? Google isn't your enemy)
Download Google Apps
here for playstore and google accounts sync
Download UI of Life
here
Just incase though, here is how to install:
BACKUP YOUR APPS AND DATA FIRST
download the rom and its specific recovery
download Mobileuncle Tool
put the specific recovery in the root of your sdcard
--open MobileUncle Tool
--tap recovery update
--select the specific recovery
--reboot into recovery
navigate to the downloaded miui rom
wipe factory reset
select and flash it!
your done! and be sure to enjoy your new rom!
Note this will wipe your phone first so please remember to backup. you can use titanium backup for that.
Note also: this rom is like nothing you are used to. Addiction to it is highly likely.
Note also also: this is a custom rom. its not 100% so if something is not working as it should just mention it and i will try to fix it.
Thank you and have a nice day.
Features:
Based on official Jaiyu JB 4.1.2
Phone: Full Screen Caller ID with Auto Record Options
Messaging: Smart Auto Recipient
Network Assistant
Anti-Spam Manager
Virus Scan
ROM Backup and Restore
Password Settings
Complete Autostart Control
Permission Manager
Inbuilt Theme Engine with Theme Manager
Guard Mode
MiCloud Service with 10GB!!
MiSpace
MiTransfer
MiDownload Manager
MiUpdater
MiMusic
Unique Flip Styled Statusbar [Transparent]
Do Not Disturb Mode
Fast and Slim Launcher
And more than 200+ Functions
Here are some tips:
MIUI has its on market which unfortunately isnt in english. please flash the google apps after flashing the rom so install playstore. Flash from cwm the same way you flashed the rom.
The rom doesnt need to be rooted so please dont attempt it. you should see a folder named system. inside an app named permisions. open it and and click on root. switch on enable permission manager and yhe phone is rooted. switch it off to unroot (dont see why you would want that anyway)
Playstore might give you an error and ask you to download via wifi for files larger than 1MB. to change that open the system folder and open the downloads app. press menu and select settings. change the limit from there. it helps you control the amount of mb playstore eats.
 BUGS
BUGS
Network 3G/2G Toggle doesn't work. you have to do it manually.
3. If you loved the Thunderous Nightmare Rom then you would love this even more.
[ROM] [4.2.2] Xperia Blast Custom Rom For Tecno A+ (Xperia C Features)
Android 4.2.2
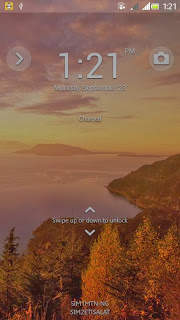
Xperia C LockScreen (Slide up/down to unlock)
Dual Sim
CRT Lock Animation
Internal Storage & SD Card swapped
Xperia C Quick Toggles
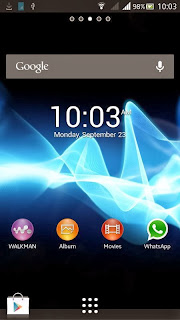
Xperia C Launcher
Xperia C Dialer
Xperia C Contacts
Xperia C Alarm & Clock
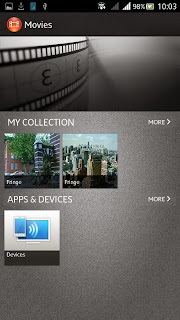
Xperia Movies
Xperia Albums
Xperia Wallpapers
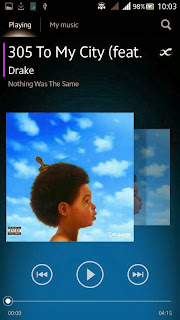
Xperia Walkman
Xperia Widgets
Xperia Sounds
Xperia Bootanimation
Xperia Fonts
Xperia Framework
Xperia Keyboard
Xperia Sketch App
Xperia Notes App
Downlaod Music Info
Xperia C SystemUI
Xperia C Settings
Xperia Album Share
Xperia Sound Enhancement
Xperia Calculator
Xperia Icons
Memory CleanUp
Adjust All Background Color to Album Art on Walkman
Music Control on Notification
Clear Bass
Clear Stereo
Dynamic Normalizer
xLoud
Surround Sound VPT
Walkman Music Widget
Walkman DLNA
Walkman More Stable
X-Reality Engine for Album & Movies
Photo & Video widget
Busybox
Performance Tweaks
Faster Streaming
Net Speed Tweaks
No Delay In Making Call
Deodexed & Zipaligned
Build.prop Tweaks
Init.d Scripts
Pre-Rooted
Added Swipe to wake : Launch Proximity actions > Screen off actions > 2Waves > Wake Up. Now to wake up the device wave twice over the proximity sensor instead of the power switch.
Other features in proximity actions: Swipe to answer call, Auto answer call when you put the phone to your ear, Wave to answer.......explore other options for yourself
Download Link:
Download
Sony Boot Logo:
Download
Note: After Installing the ROM and Patch, Launch the Keyboard Light Controller app > Check "Lock on bklight" > Check "Only when screen on"
Capacitive buttons patch:
Download
How To Flash :
( You should take CMW Backup ncase you wish to revert back to your old system )
1) Download ROM File and Capacitive Light Patch
2) Put into External/Internal SD Card
3) Go To CMW Recovery
4) Wipe Data/Factory Reset And Wipe Partition
5) From Advance Menu Do Dalvik Cache Clear
6) From Advance Menu Do Battery State Clear
7) Go in Mount And Storage select FORMAT SYSTEM
cool Select Install From SD and Select Rom And Click YES
9) Select Install From SD and Select the Capacitive Light Patch And Click YES
9) Reboot Your System
After Reboot, Launch the Keyboard Light Controller app > Check "Lock on bklight" > Check "Only when screen on"
(Follow similar steps for TWRP)
What works:
All features.
1) Camera - Front & Rear
2) FM Radio - Speaker & Headset
3) Wi-Fi & Mobile Internet
4) Bluetooth
5) GPS
6) Walkman
7) Movies
cool X4 Video Player...............................etc
Features not available in this ROM:
No 3G in SIM-2
Credits:
Porting and Testing: Only Me.
Xtreme Booster: a developer from Xda
Bugs: None that I noticed. Please report ,,,,
Disclaimer :
I will not be responsible for any damages whatsoever to your device after flashing this ROM. Flash at your own risk.
for normal notification scroll down with one finger. For the alternate tabs scroll down from the top with two fingers. Try it, I think its fun
Version II is
HERE

PLEASE CHECK EVERY WEEK FOR MORE UPDATES FOR THIS PHONE.
ROMS FOR OTHER TECNO PHONES COMING SOON


